But with many things, theres always hurdles to overcome.
One of the draws of the RPi Zero is the size and power consumption figures compared to its siblings: with idle ratings as low as 80mA (0.4W) vs RPi 2B's 200mA (1W) which will be even more favourable compared to the RPi 3B.
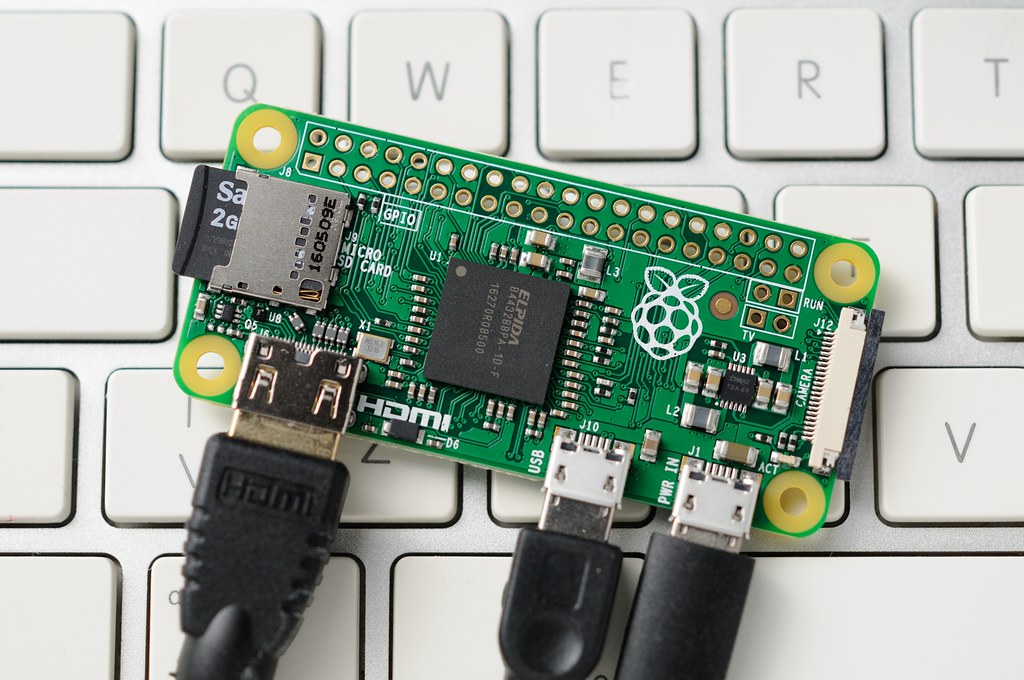
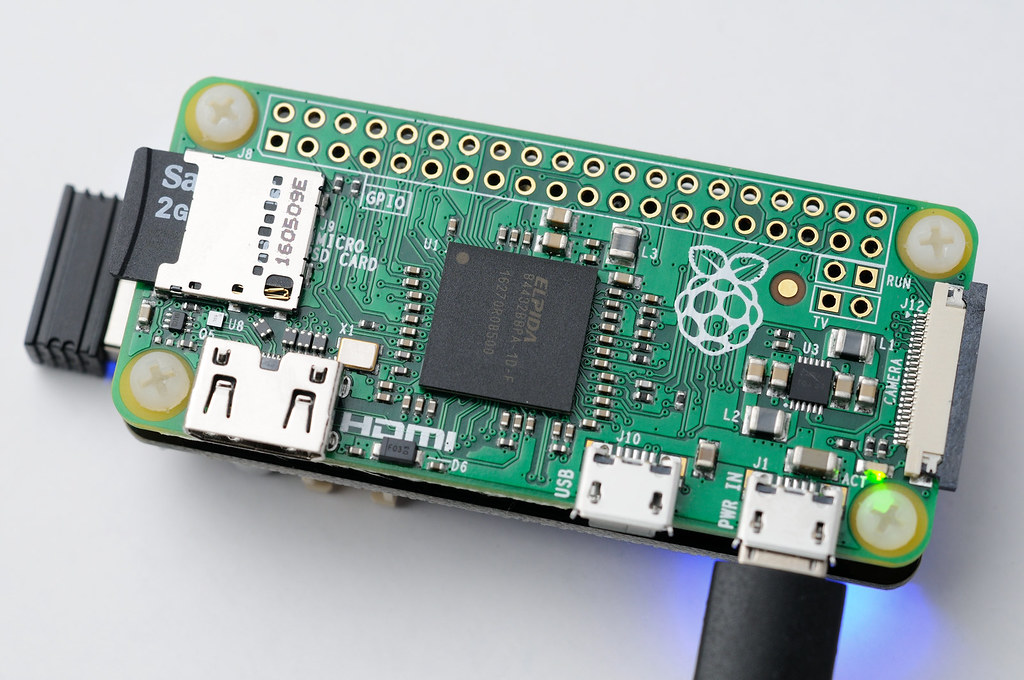
The downside is that the RPi Zero has limited connectivity: 1x mini HDMI jack, no wifi/ethernet/bluetoot and only 1x OTG USB jack (the 2nd jack is for power only).
Side note: you can configure the RPi Zero to connect to another machine via USB for network access including routing the same USB interface to the outside world.
The upside is that most of the adaptors required to hook up the RPi Zero are commodity items that I had lying around including the OTG cable and a (semi broken) wired Apple keyboard with embedded 2x port USB hub.
Adding and hacking a broken Keyboard
Eventually the RPi Zero will be run headless and without a keyboard attached but for now I want to attach a keyboard so the system can be configured and setup.I have a spare wired Apple A1243 keyboard that has 2x USB ports (max rating of 5v/1A) but the backspace key is broken/non-responsive. This can easily fixed by remapping the console's keymap (X's key mapping is different) via
loadkeys and dumpkeys.Configuring/Remapping the keys
The system should have the correct LANG/keymap installed/setup (viadpkg-reconfigure keyboard-configuration) before continuing since we will be modifying the keymap.The steps are relatively simple:
dumpkeys- obtain current keymapshowkey- determine the keycode of broken keyshowkey- determine the keycode of target key- update/swap the keycode in target keymap and load keymap
From this we know the media-eject key generates keycode 161. Looking in the original key map we can replicate the keycode details of the original key and copy details to the target key code:$ dumpkeys > key.map $ showkey kb mode was UNICODE [ if you are trying this under X, it might not work since the X server is also reading /dev/console ] press any key (program terminates 10s after last keypress)... keycode 28 release keycode 161 press keycode 161 release
keycode  35 = +h               +H               +h
        control keycode  35 = BackSpace
        shift   control keycode  35 = BackSpace
        altgr   control keycode  35 = BackSpace
        alt     keycode  35 = Meta_h
        shift   alt     keycode  35 = Meta_H
        control alt     keycode  35 = Meta_BackSpace
...
keycode 161 = nul              nul              nul
        control keycode 161 = nul
        shift   control keycode 161 = nul
        alt     keycode 161 = nul
        control alt     keycode 161 = nul
keycode 161 entry to be:keycode 161 = BackSpace BackSpace BackSpace
control keycode 161 = BackSpace
shift control keycode 161 = BackSpace
alt keycode 161 = nul
control alt keycode 161 = nul
Automating via udev
The simple way to Load (remapped) keymap for broken keys resetting the buggy ISO loyout flag for the kernel module is to force it in /etc/rc.local like:loadkeys apple-a1243brk.map
echo 0 > /sys/module/hid_apple/parameters/iso_layout
However a cleaner way to do this is via
udev so the actions are only executed when this keyboard is attached: this requires as set of rules/actions and a script to be run. The script:#!/bin/bash
LOG=/tmp/udev-apple-a1243brk.log
echo "re-run Apple 1243 loadkeys/reste ISO layout at $(date)" >> $LOG
/usr/bin/loadkeys /etc/kbd/apple-a1243brk.map
echo 0 > /sys/module/hid_apple/parameters/iso_layout
And the rule:
# /etc/udev/rules.d/99-apple-a1243brk.rules
#
# udevadm test $(udevadm info -q path -n /dev/input/by-id/usb-Apple__Inc_Apple_Keyboard-event-kbd)
# udevadm info -a -n /dev/
# udevadm control --reload-rules
#
# whilst unplugging/plugging, run this to verify what udev is seeing to get correct attr/id etc
# udevadm monitor --property
#
# usb 1-1.2: new low-speed USB device number 3 using dwc_otg
# usb 1-1.2: New USB device found, idVendor=05ac, idProduct=0221
# usb 1-1.2: New USB device strings: Mfr=1, Product=2, SerialNumber=0
# usb 1-1.2: Product: Apple Keyboard
# usb 1-1.2: Manufacturer: Apple, Inc

ACTION=="add|change", SUBSYSTEM=="input",
ATTRS{idVendor}=="05ac", ATTRS{idProduct}=="0221",
RUN+="/usr/bin/udev-apple-a1243brk.sh"
udevadm monitor --property command and updating the rules accordingly. Additionally check the output of lsusb since the idProduct can be different depending on the version: 2007 keyboard=0221, 2015 keyboard=0250Power and attaching things to the unpowered Hub
No Power to USB thumb drive
Without networking available yet, I try to configure the RPi Zero using the Apple keyboard and attaching a USB thumbdrive, to the Apple keyboard hub, as the data source for files etc.However we see there are no additional block devices (via
lsblk) - determing the reason for the USB disk not available, we find:$ dmesg
...
[ 582.489970] usb 1-1.3: new high-speed USB device number 5 using dwc_otg
[ 582.591012] usb 1-1.3: New USB device found, idVendor=0781, idProduct=557d
[ 582.591059] usb 1-1.3: New USB device strings: Mfr=1, Product=2, SerialNumber=3
[ 582.591081] usb 1-1.3: Product: Cruzer Force
[ 582.591104] usb 1-1.3: Manufacturer: SanDisk
[ 582.591126] usb 1-1.3: SerialNumber: xxxxxxxxxxxxxxxxxxxx
[ 582.610152] usb 1-1.3: rejected 1 configuration due to insufficient available bus power
[ 582.610201] usb 1-1.3: no configuration chosen from 1 choice
[ 582.610225] usb 1-1.3: No support over 100mA
Note the
idVendor value of the attached USB thumb drive and examine on the USB bus, looking for max power consumption (MaxPower) that the device can draw and determine if the system is misreporting the available power. In this case:$ lsusb -v -d 0781:. The device reported that it would draw max 200mA.Using the bus number, force the configuration to override power warning if you are sure the power rating is wrong:
 $ cat /sys/bus/usb/devices/1-1.3/bConfigurationValue

$ echo 1 > /sys/bus/usb/devices/1-1.3/bConfigurationValue
The issue is that I haven't found references for the power available via the RPi Zero's OTG USB port. With the RPi 2, setting:
# /boot/config.txt

max_usb_current=1
Wifi connectivity via mini USB dongle
Trying to find an cost effective USB dongle that could also support monitor mode pointed me devices that used the ralink RA5370 chipset which would be supported thert2800usb kernel module.However there were stability problems reported with the RPi and this chipset resulting in wifi TX errors (
ieee80211 phy0: rt2800usb_entry_txstatus_timeout: Warning - TX status timeout for entry .. in queue) leadig to locking up the wifi device. This would be a big PITA since the RPi Zero will ultimately be headless and with no keyboard attached and attempting to debug the issue will also require retrieval of the device.Whilst it's yet to be determined if the later kernels (4.4.x of the Raspbian Jessie release of Nov 2016) compared to the 3.6.x kernels available in Oct 2014. However the reported fixes were to ensure updated RAlink firmware and to disable the power management function.
$ apt-get install firmware-ralink
# disable power mgnt for wlan i/f
$ vi /etc/network/interfaces
...
auto wlan0
allow-hotplug wlan0
iface wlan0 inet static
    address 192.168.0.150
    netmask 255.255.255.0
    gateway 192.168.0.1
    wireless-power off
    # post-up iwconfig wlan0 power off
    wpa-roam /etc/wpa_supplicant/wpa_supplicant.conf
iwconfig | grep "Power Management:off" and we should be ready with a usable system.Cheap RealTek USB wifi dongle
Another common and cheap USB wifi dongle chipset is the RealTek 8188EU (USB id 0bda:8179) - on the RPi is uses ther8188eu kernel module but the Raspbian kernel logs that the driver r8188eu: module is from the staging directory, the quality is unknown.The driver works once it is force loaded at start up/upon insert of USB dongle and With limited testing it seems reasonably stable although
ifconfig reports a 0.1% of RX packets dropped - this is with power mgnt disabled.One pain with the stock Raspbian 4.4.38 kernel module is that it does NOT appear to support monitor mode: certainly
iwconfig wlan0 mode monitor fails. One of the wireless kernel maintainers, Larry Finger, own rlt8188eu github driver is no improvement. However, there does exist the load/runtime parameter modprobe r8188eu monitor_enable=1 (and verifiable at /sys/module/r8188eu/parameters/monitor_enable) option that can be enabled which will create a mon0 interface along side the normal interface. The mon0 interface can be used directly with aircrack or tshark although I'm still to determine if injection works on this interface.I've found that whilst the module can be force loaded as part of the boot sequence (adding
r8188eu to /etc/modules) sometimes the interface does not come up - pulling the wifi dongle causes the system to rebootudev rule helps avoid this.# /etc/udev/rules.d/50-rlt8188.rules
ACTION=="add", SUBSYSTEM=="net",
ATTRS{idVendor}=="0bda", ATTRS{idProduct}=="8179",
RUN+="/usr/bin/udev-rlt8188.sh"
With action script
#!/bin/bash

LOG=/tmp/$(basename).log

echo "RealTek wifi dongle detected  $(date)" > $LOG
/sbin/modprobe r8188eu

BUS="$(basename $(\ls  -d /sys/bus/usb/drivers/r8188eu/1-1.1\:1.0 ) | cut -f 1 -d :)"
echo 1 > /sys/bus/usb/devices/${BUS}/bConfigurationValue
Note that this FORCES the system to accept the power requested by this device even though it advertises that it takes up to 500mA.
Powering USB devices
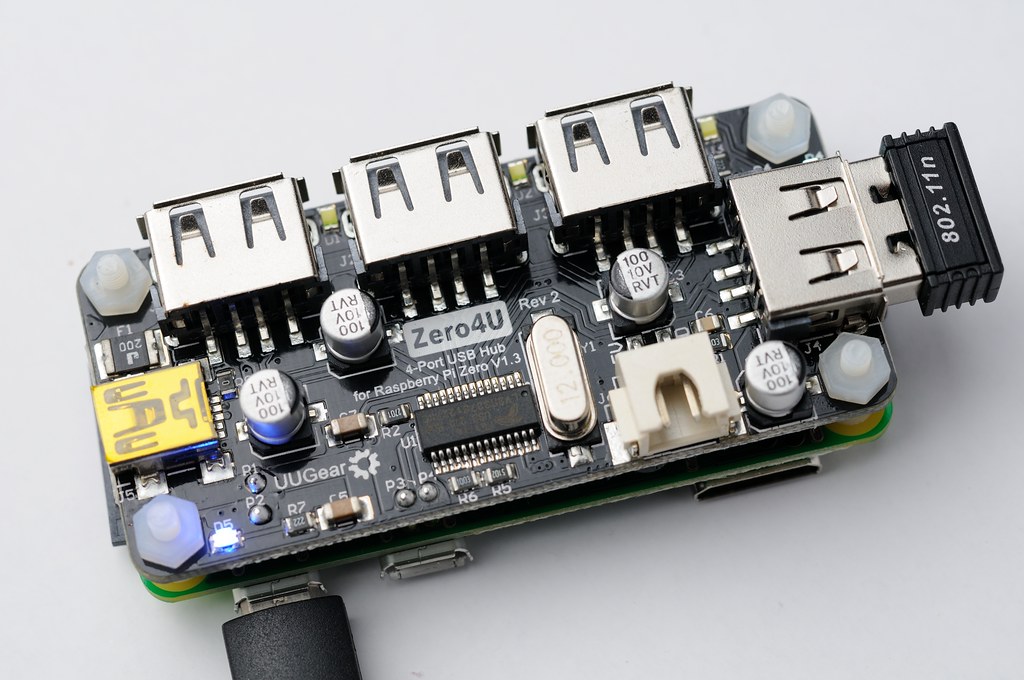
One of the problems that I discovered with the USB port is that it doesn't appear to want to supply more than 100mA - you can force the system to accept the USB devices but it its not stable; the RealTek wifi dongle is an example. This means that we're forced to add a powered USB hub to the system if we wan to attach extra USB devices. However most traditional USB hubs are just another rats nest of cables that means we negate the beneifit of the RPi Zero's formfactor.There does however exist a 4x port powered USB hub, called Zero4u, that 'attaches/piggy backs' directly to the RPi Zero - this device requires no soldering and no external power (it taps into the 5v rail of the RPi Zero directly).
Using the RealTek USB wifi dongle in the Zero4u resolves all of the boot/connectivity problems as long as the module is loaded at boot time.
Now for Something a little different
With a working system now we can explore some of the more interesting opportunities for the low powered Pi. One item of interest is using this for a home monitoring solution incorporating the Raspberry Camera modules, a USB webcam or some (cheap) network enabled camera: such a home camera monitoring solution can be achieved using motion (as the backend) and motioneye (web interface enumerator for all cameras on your network).With the Raspbian Jessie release most of the installation can be directly pulled from the official repos
$ apt-get install motion
$ aptitude install python-tornado python-jinja2 python-imaging
$ apt-get install python-pip
$ pip install motioneye
$ mkdir /etc/motioneye
$ mkdir /var/lib/motioneye
$ vi /etc/motion/motion.conf
...
output_pictures off
ffmpeg_output_movies off
stream_localhost off
motioneye - it is important to stress that this software has some security bugs in that configurations containing passwords (for the admin console and remote cameras) are simply stored in plain text and in files with world readable access.$ touch /etc/motioneye/motion.conf
$ chmod 600 /etc/motioneye/motion.conf ## contains the admin/normal user and passwd details
$ /usr/local/bin/meyectl startserver
motioneye provides its webpage at http://server:8765 with admin user with no password which should be changed from the gui. Adding cameras is easy from the drop down boxes.For cheap wifi "security" cameras with WansView heritage (which you should avoid) these provide a MJPEG stream that can configured - the username and password can be left empty s the credentials are sent in plain-text which you can add to the
motioneye configuration screen: ie http://192.168.0.x/videostream.cgi?loginuse=user&loginpas=password.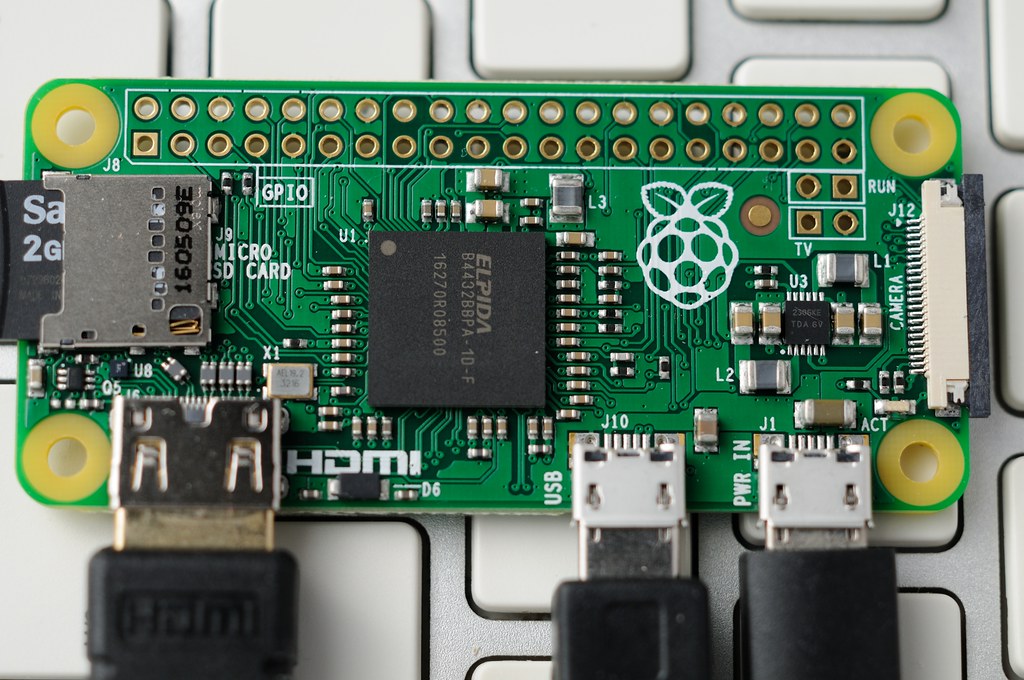
No comments:
Post a Comment