Many years ago (~2004?) I used a Roku SoundBridge M1000 to stream music (wirelessly) from my linux box to the Roku which was connected (RCA) to my hifi amplifier and speakers. The Roku was really an iTunes client but obviously iTunes didn't run on linux but there was a great little (now defunct) project called mt-daapd (later Firefly Media Streamer) that implemented the Apple DAAP protocol.
This worked but the problem I found was that the Roku onboard DAC was pretty bad - whilst it had a digital out that you could feed into a dedicated DAC before routing to the amplifier I didn't have such a DAC. It would also require a PC to be running to serve the music - sure these days my NAS could serve music but it's still a little noisy and power hungry.
What I was requiring is a inexpensive way to play digital music through my amplifier with reasonable music quality, draw little power and be easily controllable to select music.
UPDATE 2018- no longer any reason to try to force using volumio with all the hacks on a RPI, much better to simply run forked-daapd as the backend music server and its universal HTML5 based web front end to control and negates any special custom OS build
Enter the Raspberry Pi 3 as a soluton running Volumio2.
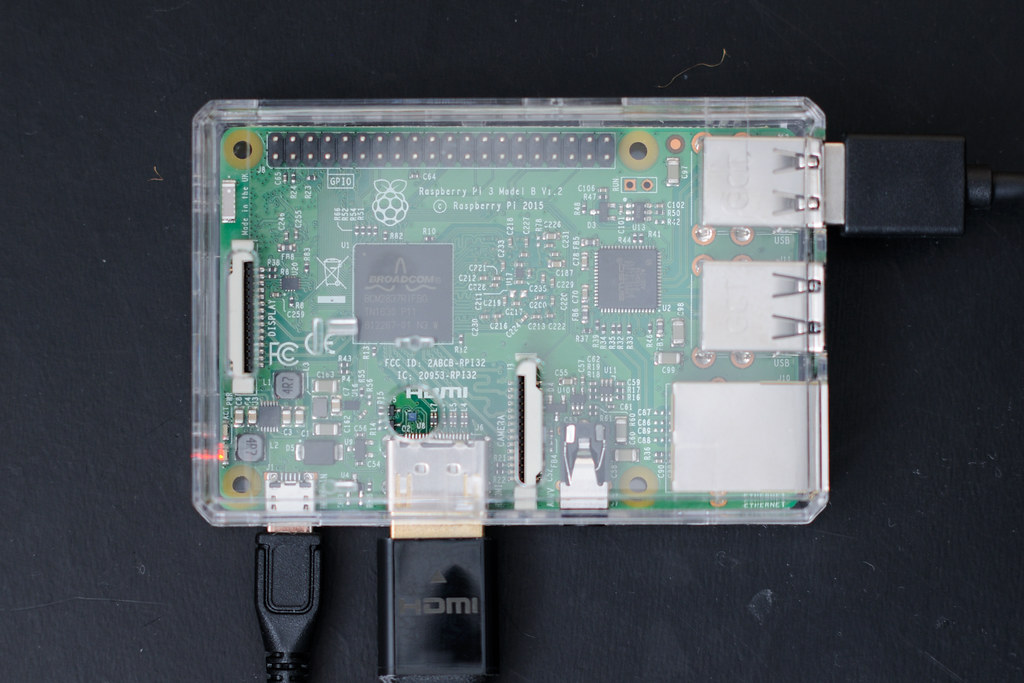
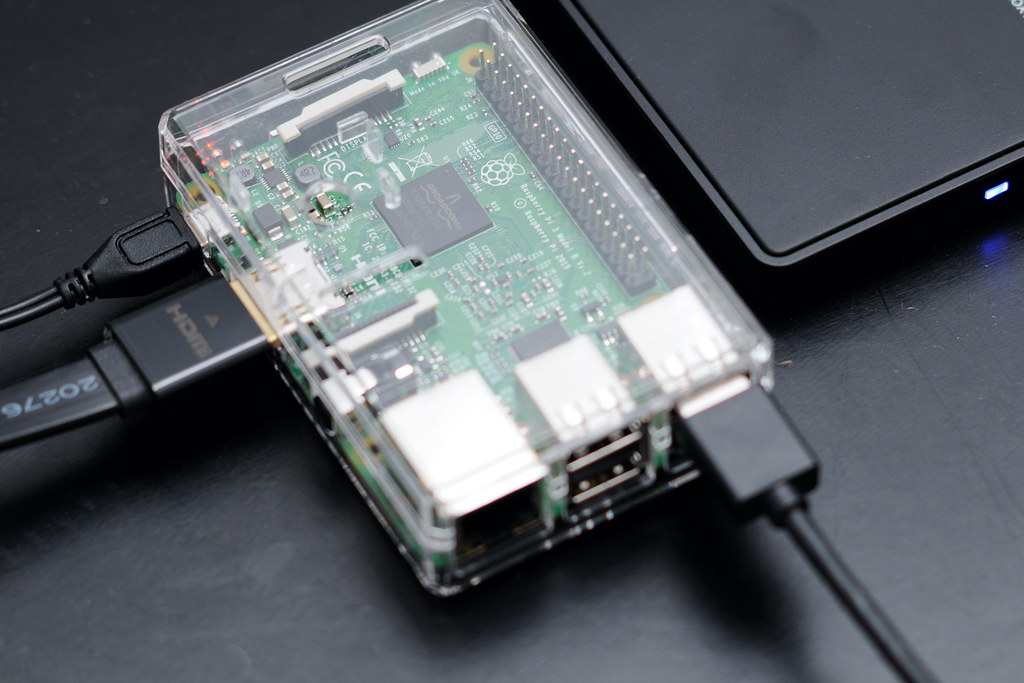
The RPi3
The RPi3 provided the h/w (wireless/fast ethernet/lowish power consumption) and Volumio providing the simple Raspbian (Debian-based) OS available as simple data image that could be flashed to an SD card and booted.Volumio uses mpd is its backend and layers on top of it a simple UI interface for users - all you need to do is provide the music, either as a USB device attached to the RPi or by setting up a network (NFS or/and CIFS) share. Control (selecting tracks etc) is provided via its simple WebUI interface available on your local network as http://volumio.local.
Perfect!
To install Volumio, pull down the Volumio2 disk image and write it to the SD on any other machine:
$ dd \
    if=volumio-2.031-2016-11-23-pi.img \
    of=/dev/sdb \
bs=4M status=progressof= parameter is the device representing the target SD card! Once complete, insert to the RPi, attaching any USB disks containing your music and power up. The setup instructions available on Volumio site is straight fwd - the device (if no ethernet is connected) will create a Wifi Hotspot called "Volumio" (passwd=volumio2) that you can connect and reconfigure Wifi and it's pretty much done.One note, the RPi3 by default provides sufficient power through its USB ports to power a standard USB 2.5" HDD enclosure but you really need a suitable power supply for the RPi3 itself.
Side Note: Mounting disk image partitions
To can examine the disk image and mount the partitions:$ file disk.img
disk.img: DOS/MBR boot sector; partition 1 : ID=0xc, active, start-CHS (0x0,0,2), end-CHS (0x7,199,9), startsector 1, 125000 sectors; partition 2 : ID=0x83, start-CHS (0x7,199,10), end-CHS (0x117,159,36), startsector 125001, 4367187 sectors; partition 3 : ID=0x83, start-CHS (0x117,159,37), end-CHS (0x148,65,23), startsector 4492188, 781250 sectors
# verify that img has full partition tbl as it suggests
$ fdisk -l disk.img
disk.img: 2.7 GiB, 2831155200 bytes, 5529600 sectors
Units: sectors of 1 * 512 = 512 bytes
Sector size (logical/physical): 512 bytes / 512 bytes
I/O size (minimum/optimal): 512 bytes / 512 bytes
Disklabel type: dos
Disk identifier: 0x20123390
Device Boot Start End Sectors Size Id Type
disk.img1 * 1 125000 125000 61M c W95 FAT
disk.img2 125001 4492187 4367187 2.1G 83 Linux
disk.img3 4492188 5273437 781250 381.5M 83 Linux
So everything checks out. We can know force
mount to mount the FS using loopback and offsetting to the start position of the partition we're interested in. Note that the fdisk output gives us positions in terms of 512byte blocks so we need to take that into account. Mounting the second partition:$ mount disk.img /mnt -o loop,ro,offset=64000512 # 512x125001
Volumio Post Install
As Volumio is intended pretty much as an end user solution, there are none of the useful things that geeks would want such as the compiler nor even vi. This is easily fixed by logging into the terminal asvolumio (passwd=same as username):$ sudo su -
$ apt-get update
$ apt-get install gcc g++ make
$ apt-get install vim
$ apt-get install flac id3tool
# fix annoyances
# /etc/inputrc
set show-all-if-ambiguous on
set editing-mode vi
# /etc/bash.bashrc
PS1='${debian_chroot:+($debian_chroot)}[\j]\u@\h:[\W]\$ '
alias ls="ls -F --color=auto"
# volumio user annoyances
# /home/volumio/.bashrc
PS1='${debian_chroot:+($debian_chroot)}[\j]\u@\h:[\W]\$ '
Volumio == no bluetooth
Whilst the RPi 3 supports bluetooth (and the Raspbian images work fine), Volumio somehow disables bluetooth for some reason. Bringing down thebluetoothctl subsystem still shows that there are no bluetooth contollers available even with all the bluetooth modules loaded.Trying to bring Volumio inline with the normal Raspbien installation by running
rpi-update does NOT work and this BREAKS Volumio resulting in an unbootable system requiring a fresh reflash - this is painful if you've set up any big applications on top of Volumio.This means that using a bluetooth keyboard with Volumio is not possible at this time.
Setting up the Audio Output and DACs
As with the rest of Volumio, the audio settings can be done from the WebGUI.The RPi only has HDMI out which can carry audio and then a 3.5 audio jack. Whilst you can plug the HDMI to a TV (which in turn can be configured to output sound to an amplifier as in my case) can we still improve the audio output quality? Yes.
There are a number of RPi add-on boards that provide a dedicated DAC and RCA outputs that can go directly to the amplifer. The two main options seem to be the very similarly priced (30GBP) HifiBerry DAC+ which ships from Switzerland or IQAudio Pi-DAC+ which ships from Scotland.
I went for the IQaudio DAC simply due to the additional import duties from Switzerland was starting to make this little project less inexpensive.
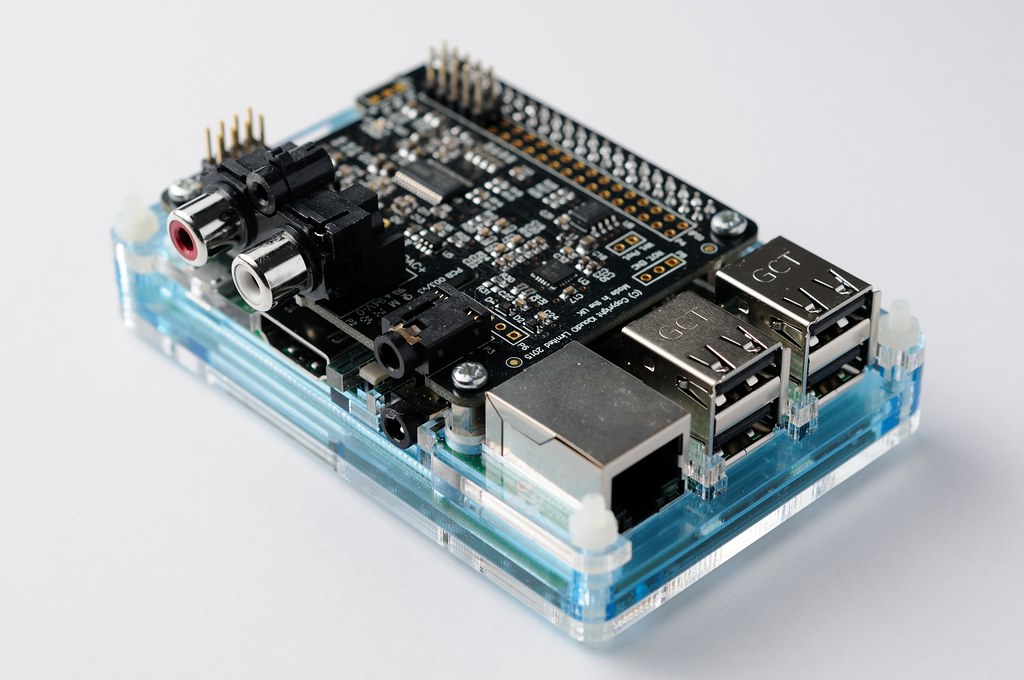
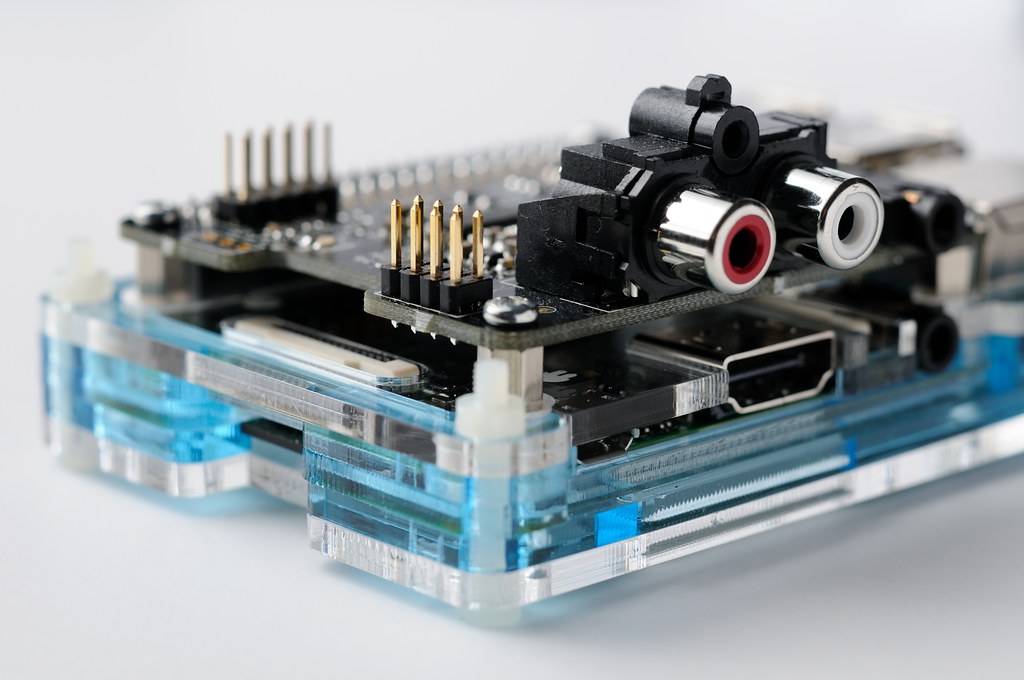
Once the DAC installed, attach and repower the system - to configure Volumio to use the new DAC is simple as the drivers are installed. Using the Volumio WebGUI, select Playback Options, toggle the I2S DAC, select DAC Model to be "IQaudIO DAC Plus" and change the Output Device save and we're done.
AirPlay
Volumio also provides some additional features for enhanced music streaming, primarily it provides an AirPlay target for IOS devices which is an added bonus.Resurrecting the Dead: DAAP
As I still have my Roku, I was also interested in streaming music from the RPi3 to the SoundBridge. I manually installed the mt-daapd source code and compiled it and it ran but it didn't behave properly: the server could be started but the Roku couldn't find it and the webpage didn't show all internal services being available.Luckily, whilst mt-daapd itself was dead/unmaintained, there was a forked called
forked daapd that was available in the Raspbian repos which installed fine and worked out of the box$ apt-get install forked-daapd
# update music location
$ vi /etc/forked-daapd.conf
directories = { "/media/" }
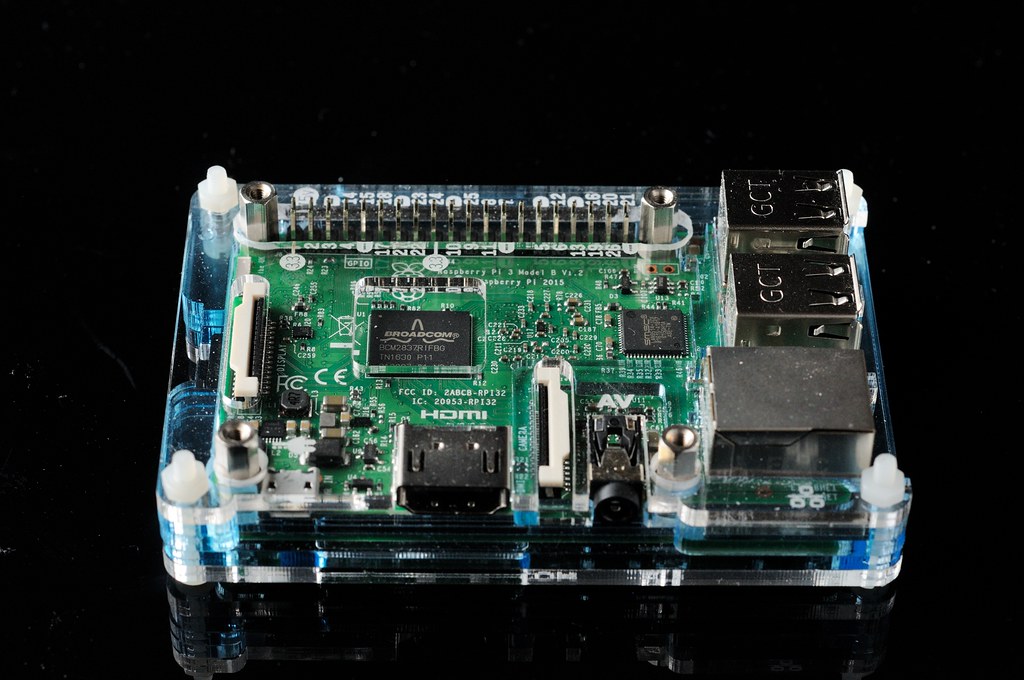
RPi3 sitting in a PiBow 3 Coupé - notice the brass posts; case was hacked to allow these to fit otherwise HAT cards just have to float insecurely
Kodi 16.x on RPi3 with Volumio2
Obviously, the RPi3 is a computer ... and whilst my main intention was to use this a way to serve my digital music to my amplifier, there was many unused CPU cycles spinning. I wondered if I could also layer Kodi along side Volumio to serve media files too.In the recent past, I've had Kodi running on Amazon FireStick but this seemed to cause network drop outs for my Chromecast that was plugged into the same TV - I'd have to reach over the back of the TV to switch out the 5v USB power cables between the devices which is slight annoyance.
So what to do with this RPi3... From the Volumio forums, this thread provides an script that will pull all the dependancies and install Kodi along side the Volumio installation. The script that I used from the thread is shown below for reference:
#!/bin/bash
# Kodi plugin installation script
echo "deb http://archive.mene.za.net/raspbian jessie contrib" | sudo tee -a /etc/apt/sources.list
apt-key adv --keyserver keyserver.ubuntu.com --recv-key 5243CDED

# Update repositories, install debugger and Kodi
apt-get update
apt-get -y install kodi

# Prepare usergroups and configure user
addgroup --system input
#adduser kodi
usermod -aG audio,video,input,dialout,plugdev,tty kodi

# Enable auto-login
INITTAB="/etc/inittab"
if grep -q "1:2345:respawn:/sbin/getty 38400 tty1" $INITTAB;
then
sed -i -- 's#1:2345:respawn:/sbin/getty 38400 tty1#1:2345:respawn:/sbin/getty --autologin volumio --noclear 38400 tty1#g' $INITTAB
fi

# Configure Kodi auto-launch
KODICONFIG="/etc/default/kodi"
if grep -q "ENABLED=0" $KODICONFIG;
then
sed -i -- 's/ENABLED=0/ENABLED=1/g' $KODICONFIG
fi

# Add input rules
echo "SUBSYSTEM==\"input\", GROUP=\"input\", MODE=\"0660\"
KERNEL==\"tty[0-9]*\", GROUP=\"tty\", MODE=\"0660\"" | sudo tee -a /etc/udev/rules.d/99-input.rules

# Add input permissions
echo "# input
KERNEL==\"mouse*|mice|event*\",   MODE=\"0660\", GROUP=\"input\"
KERNEL==\"ts[0-9]*|uinput\",     MODE=\"0660\", GROUP=\"input\"
KERNEL==\"js[0-9]*\",             MODE=\"0660\", GROUP=\"input\"
# tty
KERNEL==\"tty[0-9]*\",            MODE=\"0666\"
# vchiq
SUBSYSTEM==\"vchiq\",  GROUP=\"video\", MODE=\"0660\"" | sudo tee -a /etc/udev/rules.d/10-permissions.rules

# Map the EGL libraries
echo "/opt/vc/lib/" | sudo tee /etc/ld.so.conf.d/00-vmcs.conf
ldconfig

# Update the gpu_mem parameter
CONFIG="/boot/config.txt"
if grep -q gpu_mem=16 $CONFIG;
then
sed -i -- 's/gpu_mem=16/gpu_mem=248/g' $CONFIG
else
sed -i -- 's/gpu_mem=/#gpu_mem=/g' $CONFIG
echo "gpu_mem=248" | sudo tee -a $CONFIG
fi

echo "hdmi_force_hotplug=1" | sudo tee -a /boot/config.txt

#reboot
The Kodi installation is HDMI-CEC enabled which means that all compatible TVs will be able to user their standard TV remote controls to control Kodi. Note that different TV manufacters refer to HDMI-CEC with their own labels: for instance, Samsung call this AnyNet+. The options for configuring HDMI-CEC are burried in the System->Input->Peripherals area.
The sound for Kodi runs through the HDMI cable so there's no need to switch the inputs on my amplifier and Volumio can continue to use the IQaudio DAC output that are fed into a different set of amplifier inputs. This can be configured differently on the Kodi settings. Note if the Volumio audio output (change from HDMI to IQaudio DAC Plus) after Kodi is installed, Volumio will updated the
/boot/config.txt file affecting th gpu_setting value and resetting it to 16 which will cause Kodi not to start at boot: fixing is easy and just to update the value back to 248.Fixing Slow Kodi Shutdown
Shutting down Kodi isn't as well integrated as it could - if you shutdown the system (via Volumio's webinterface or ssh connection) with Kodi still running this may take nearly 3mins to shutdown with 2mins 25secs spent blocked waitting for the Kodi service to die.The problem appears to be the Kodi service script (
/etc/init.d/kodi) and the do_stop() function that handles the stopping of the service. The script tries to use wget to issue an RPC to Kodi via it's web interfaceto request a clean shutdown since Kodi does not obey signals.if [ -x /usr/bin/wget ]; then
wget --post-data '{"jsonrpc": "2.0", "method": "Application.Quit", "params": [], "id": 0}' --header 'Content-Type: application/json' -O /dev/null --quiet http://localhost:8080/jsonrpc
fi
Examing other debian LSB scripts I also modified the top of the stop function to become:
do_stop()
{
    if [ ! -e $PIDFILE ]; then
        log_daemon_msg "$NAME process is not running"
        log_end_msg 0
        return
    fi

    status_of_proc -p $PIDFILE $DAEMON "Stopping $DAEMON" && status=0 || status=$?
    if [ $status -eq 0 ]; then
            # Return
            #   0 if daemon has been stopped
            #   1 if daemon was already stopped
            #   2 if daemon could not be stopped
            #   other if a failure occurred
            start-stop-daemon --stop --quiet --retry=TERM/15/KILL/5 --pidfile $PIDFILE --user $USER --exec $DAEMON --startas $STARTAS

            # Kodi doesn't actually handle signals, so we have to send an RPC request to ask it to exit
            if [ -x /usr/bin/wget ]; then
                wget -T 30 --post-data '{"jsonrpc": "2.0", "method": "Application.Quit", "params": [], "id": 0}' --header 'Content-Type: application/json' -O /dev/null --quiet http://localhost:8080/jsonrpc
            fi
            # Wait for children to finish too if this is a daemon that forks
            # and if the daemon is only ever run from this initscript.
            # If the above conditions are not satisfied then add some other code
            # that waits for the process to drop all resources that could be
            # needed by services started subsequently.  A last resort is to
            # sleep for some time.
            start-stop-daemon --stop --quiet --retry=0/30/KILL/5 --user $USER --name $NAME.bin
            RETVAL="$?"
            [ "$RETVAL" = 2 ] && return 2
    fi

    # Many daemons don't delete their pidfiles when they exit.
    rm -f $PIDFILE

    # Try to fix the display
    if [ ! -z "$(which fgconsole)" ]; then
        VT="$(fgconsole)"
        if [ "$VT" ]; then
            chvt 7
            chvt "$VT"
        fi
    fi

    if [ -e $GEOMETRY ]; then
        fbset --geometry $(cat $GEOMETRY)
    fi

    return "$RETVAL"
}
It is worth noting that
wget and fgconsole (from kbd pkg) used within the script are not installed on the Volumio build by default.Furthermore, if you exit Kodi from it's menu, the service script has a problem restarting service - instead you requst a stop and then request a start.
$ systemctl stop kodi
$ systemctl start kodi
Kodi Conclusion
Most importantly following this Kodi installation, Volumio is unaffected and continues to run as expected even if we have to fix the small annoyances.RPi Physical Shutdown Button
As the RPi is a PCB, out of the box, it has no way physically way to initiate shutdown. Shutting down volumio can be done via the webinterface but sometimes it is easier to have a physical switch.There are a couple of good guides here and here but ultimately it boils down to adding a script to monitor activity on the GPIO pins and a physical open monentary switch with resistor plugged into 2 GPIO pins: ground and one other non power pin.

The pin layout above can be referred by 2 different schemes: board layout (sequential from pin1 at top left) or BCM (broadcom or GPIO) layout.
With the IQaudio DAC+ attached only 10 pins are re-exposed through the header on the DAC: pins 1-10 of these pins, there are 2 ground pins (#6 and #9).
The guides suggest using pin #5 (GPIO BCM3 slc/i2c clock) but Gordon of IQaudio confirmed with me the DAC+ uses this signal and therefore we can use other pins: ie #10 (GPIO BCM15 UART rxd). Similar comments were made by Gordon in 2014.
The Pi-DAC+ uses the following signals:
- I2S
- I2C
- GPIO 22 (This is used to mute the Pi-AMP+ if fitted)

Others you can use.

We have previously recommended the following allocations (for compatibility with the older Pi-DAC)
- GPIO 23/24 for Rotary Encoder
- GPIO 25 for IR Sensor

Hope that helps,

Gordon@IQaudio.com
IQaudio provides a modified shutdown python script called
ButttonPress.py but the Volumio system image needs to have the python and GPIO libraries installed (already installed on RetroPie)$ apt-get install python-dev
$ apt-get install gcc
$ apt-get install python-pip
$ pip install RPi.GPIO
The modified script to use pin #10/GPIO 15 to be used:
#!/usr/bin/env python2.7

# Key press detect code, uses gpio 27 and ground to a momentary switch. If pressed for more
# than 1sec but (less than 5) it will force a reboot.
# If pressed for more than 5 seconds it will force a shutdown
# Code taken from sample posted on the Foundation's forum
# by paulv >> Fri Jun 28, 2013 2:58 pm
# https://www.raspberrypi.org/forums/viewtopic.php?t=48455&p=379280
# Should be initiated in /etc/rc.local with following line:
# python /home/pi/tools/ButtonPress.py&


from time import sleep
import subprocess
import RPi.GPIO as GPIO

# GPIO channel 27 is on pin 13 of 40way connector
# with GND on pin14
#CHANNEL = 27
CHANNEL = 15

GPIO.setmode(GPIO.BCM)
GPIO.setup(CHANNEL, GPIO.IN, pull_up_down=GPIO.PUD_UP)
# setup the channel as input with a 50K Ohm pull up. A push button will ground the pin,
# creating a falling edge.


def system_action(CHANNEL):
    print('Button press = negative edge detected on channel %s'%CHANNEL)
    button_press_timer = 0
    while True:
        if (GPIO.input(CHANNEL) == False) : # while button is still pressed down
            button_press_timer += 1 # keep counting until button is released
        else: # button is released, figure out for how long
            if (button_press_timer > 2) : # pressed for > 5 seconds
                print "GPIO shutdown: shutting down - keypress (secs)=", button_press_timer
                # do what you need to do before halting
                subprocess.call(['shutdown -h now "System halted by GPIO action" &'], shell=True)
            elif (button_press_timer > 1) : # press for > 1 < 2 seconds
                print "GPIO shutdown: reboot - keypress (secs)=", button_press_timer
                # do what you need to do before a reboot
                subprocess.call(['sudo reboot &'], shell=True)
            button_press_timer = 0
        sleep(1)

GPIO.add_event_detect(CHANNEL, GPIO.FALLING, callback=system_action, bouncetime=200)
# setup the thread, detect a falling edge on gpio and debounce it with 200mSec

# assume this is the main code...
try:
    while True:
        # do whatever
        # while "waiting" for falling edge on gpio
        sleep (2)

except KeyboardInterrupt:
    GPIO.cleanup()       # clean up GPIO on CTRL+C exit
GPIO.cleanup()           # clean up GPIO on normal exit
With this script enabled and started at startup fromwake the board through GPIO. A falling edge on GPIO1 [pin #28] or GPIO3 [pin #5] will wake the board up, and it will continue to boot into linux. Note: this the the same GPIO used by safe mode, so touching a jumper onto the safe mode pin will cause the board to wake up. viewtopic.php?f=29&t=12007
/etc/rc.local the system can be shutdown cleanly with a physical switch.
No comments:
Post a Comment