Vanilla modifier vs extra diffusion vs vanilla modifier close in.
The images show different configurations with the softbox camera left, a little behind the object and feathered back towards camera with a bounce card clamped on camera right parallel to the camera.
"The larger the apparent light source, the softer the light" is the 101 of lighting. However, I was curious to see how different style of hotshoe softboxes (bounce vs shoot through - more diffused/more specular) affected the final image.
Single Diffusion through Softbox
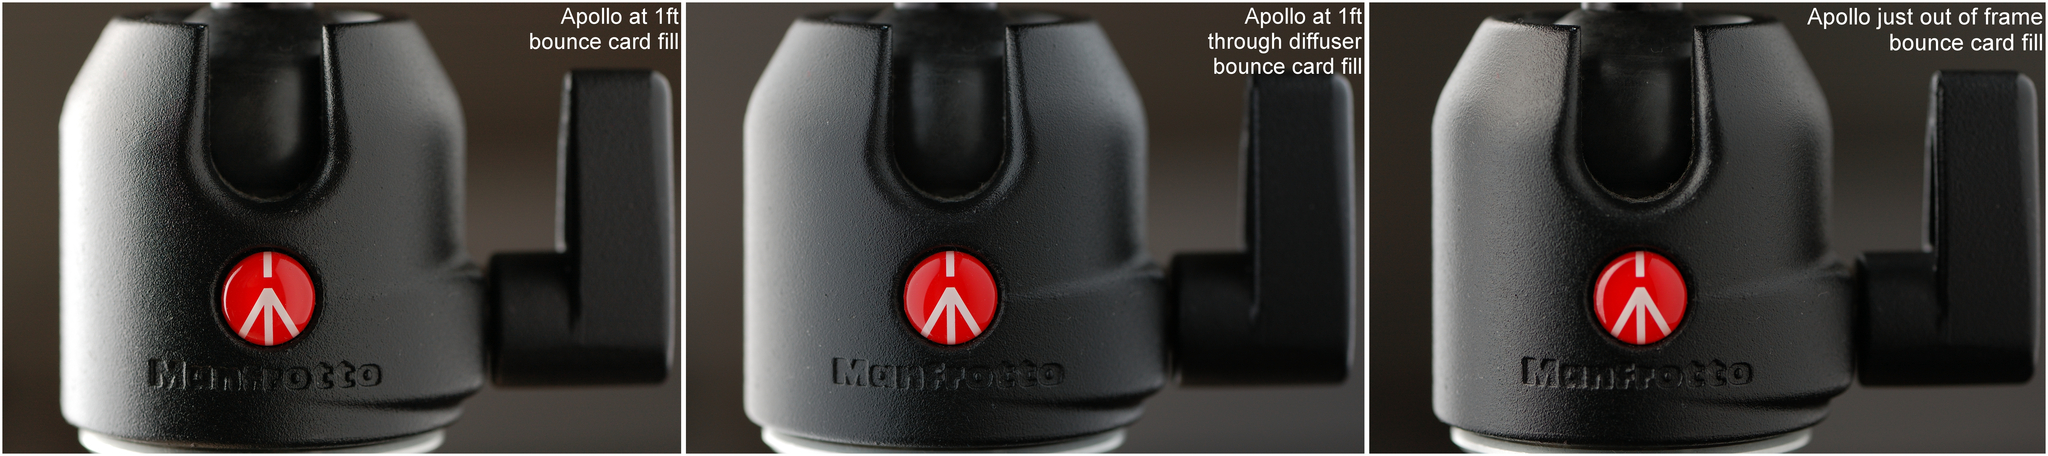
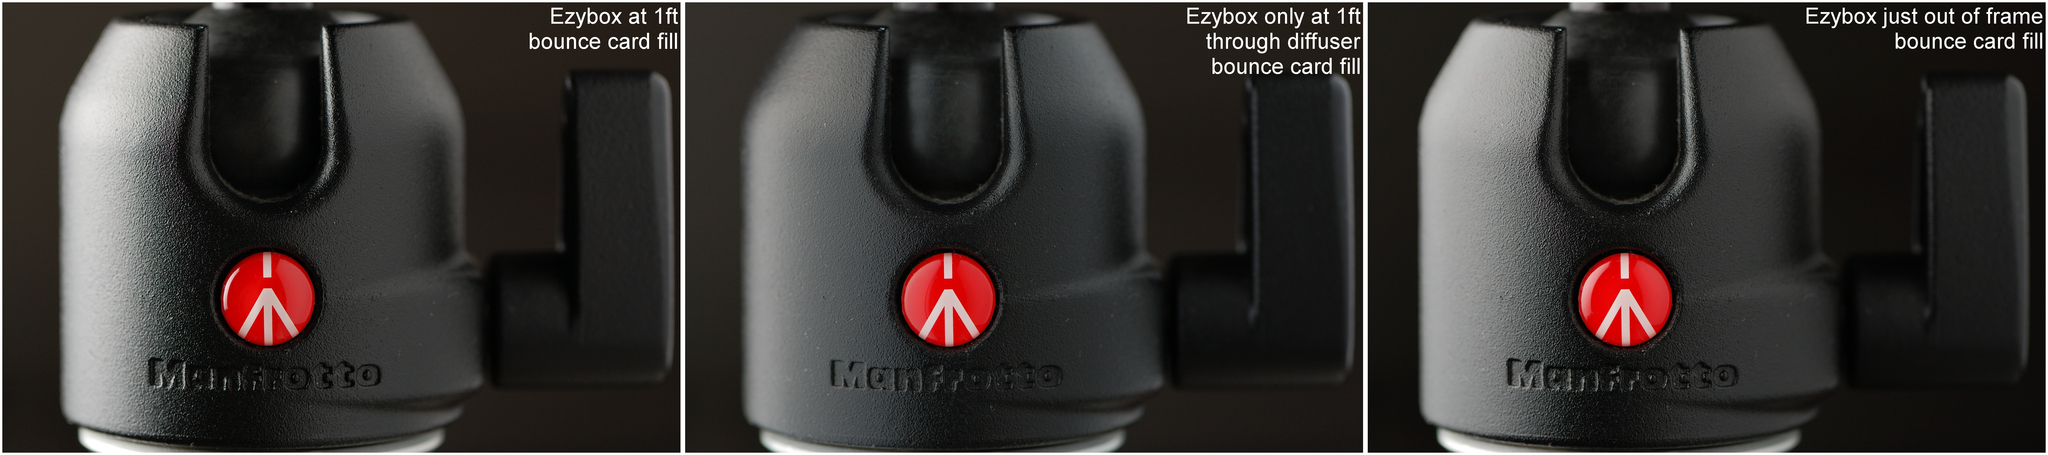
As noted the two styles of softboxes has a telling effect on the image, both with the face of the diffusion material at a distance of 1ft from the object.Ezybox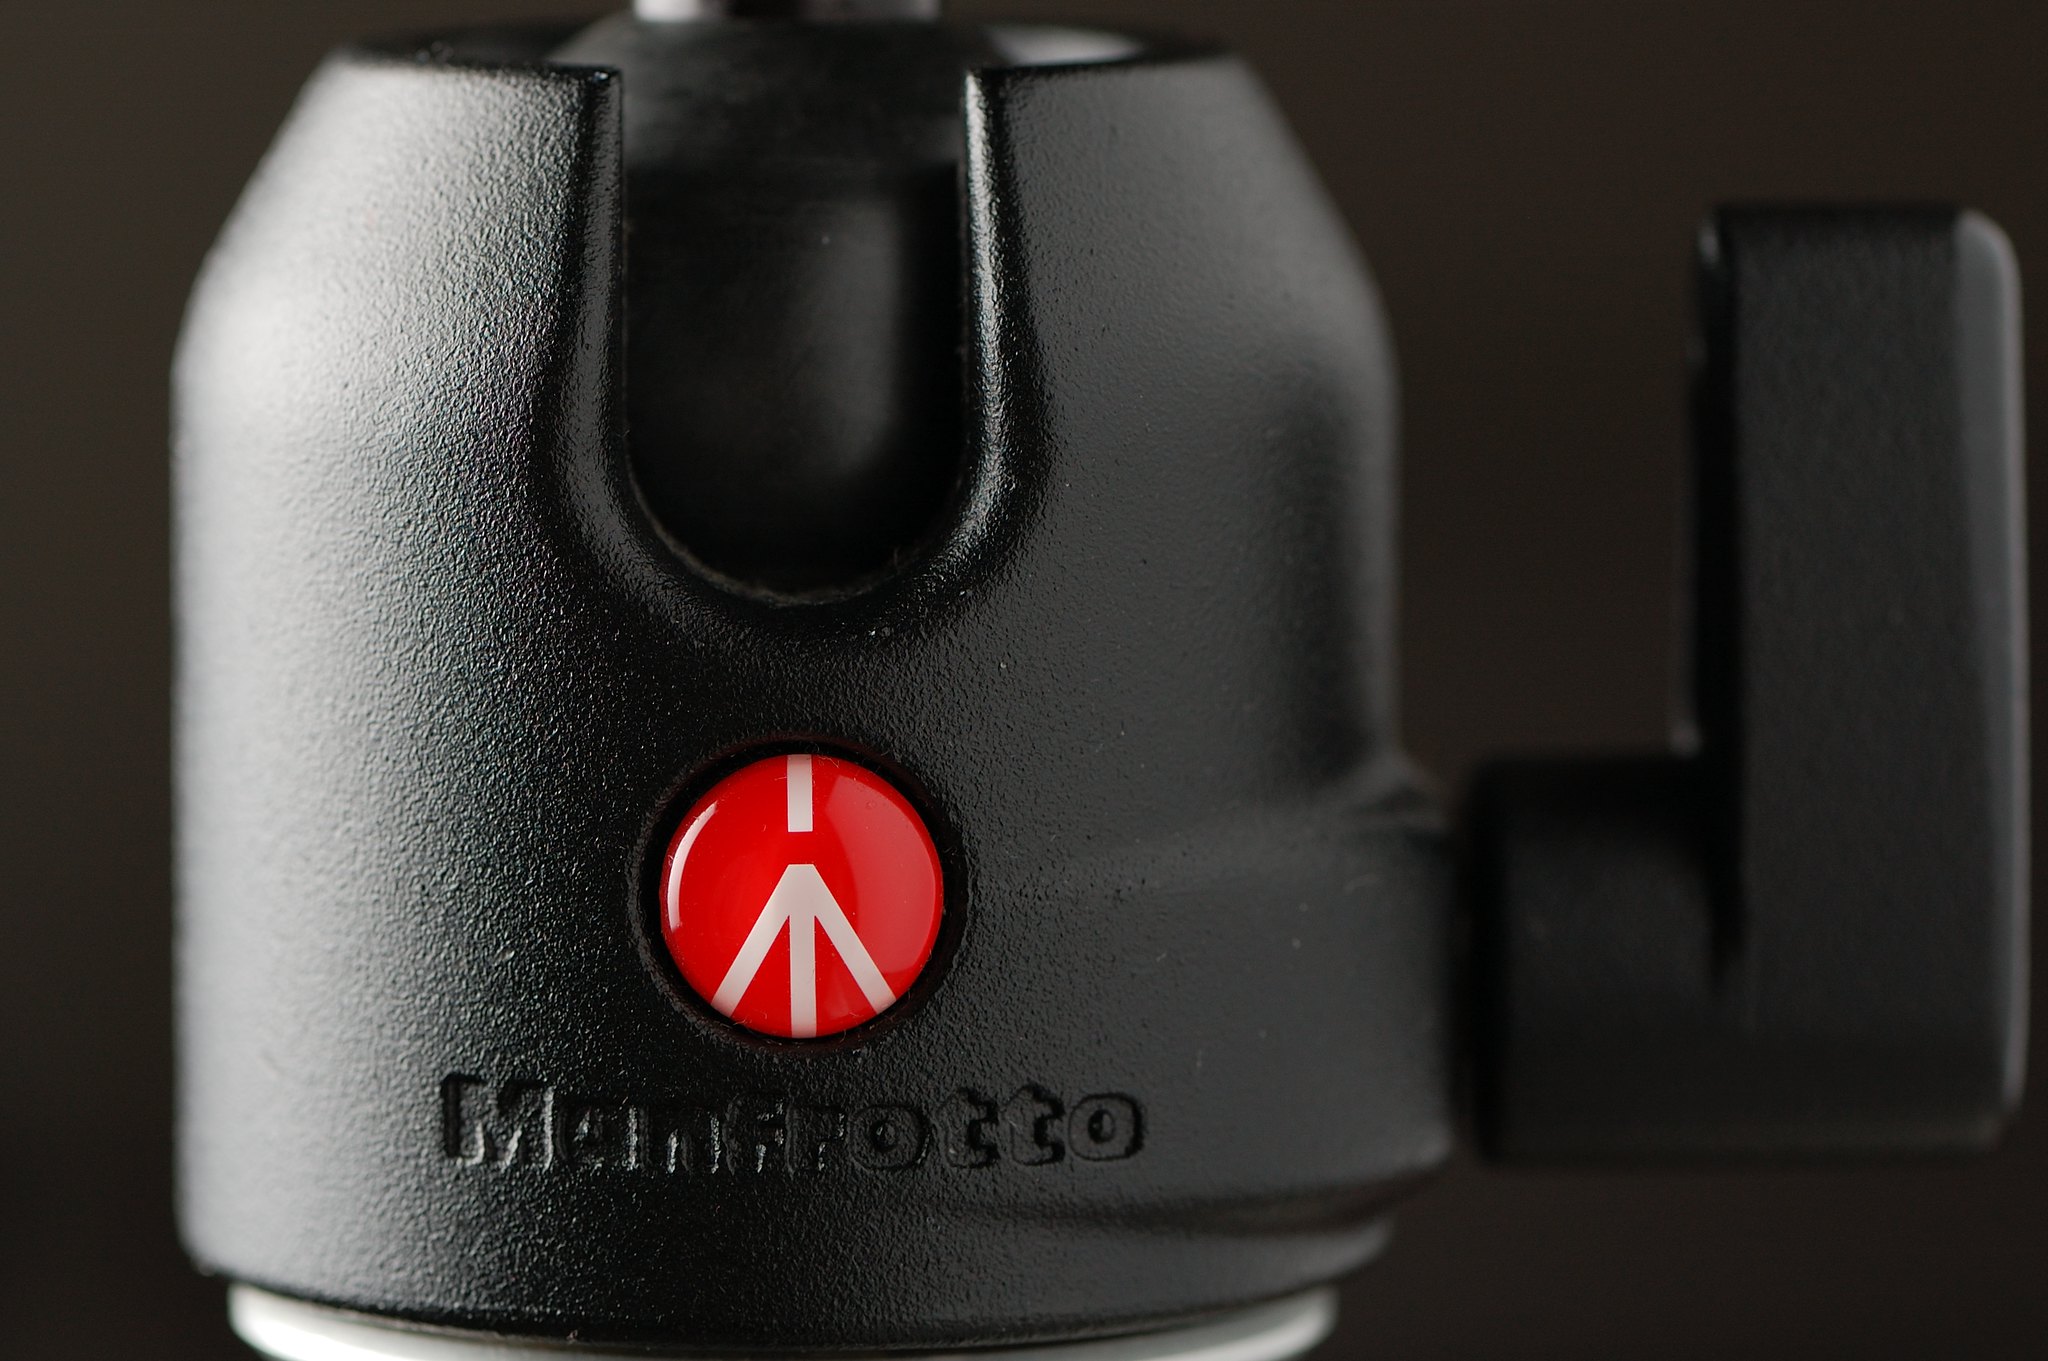 | Apollo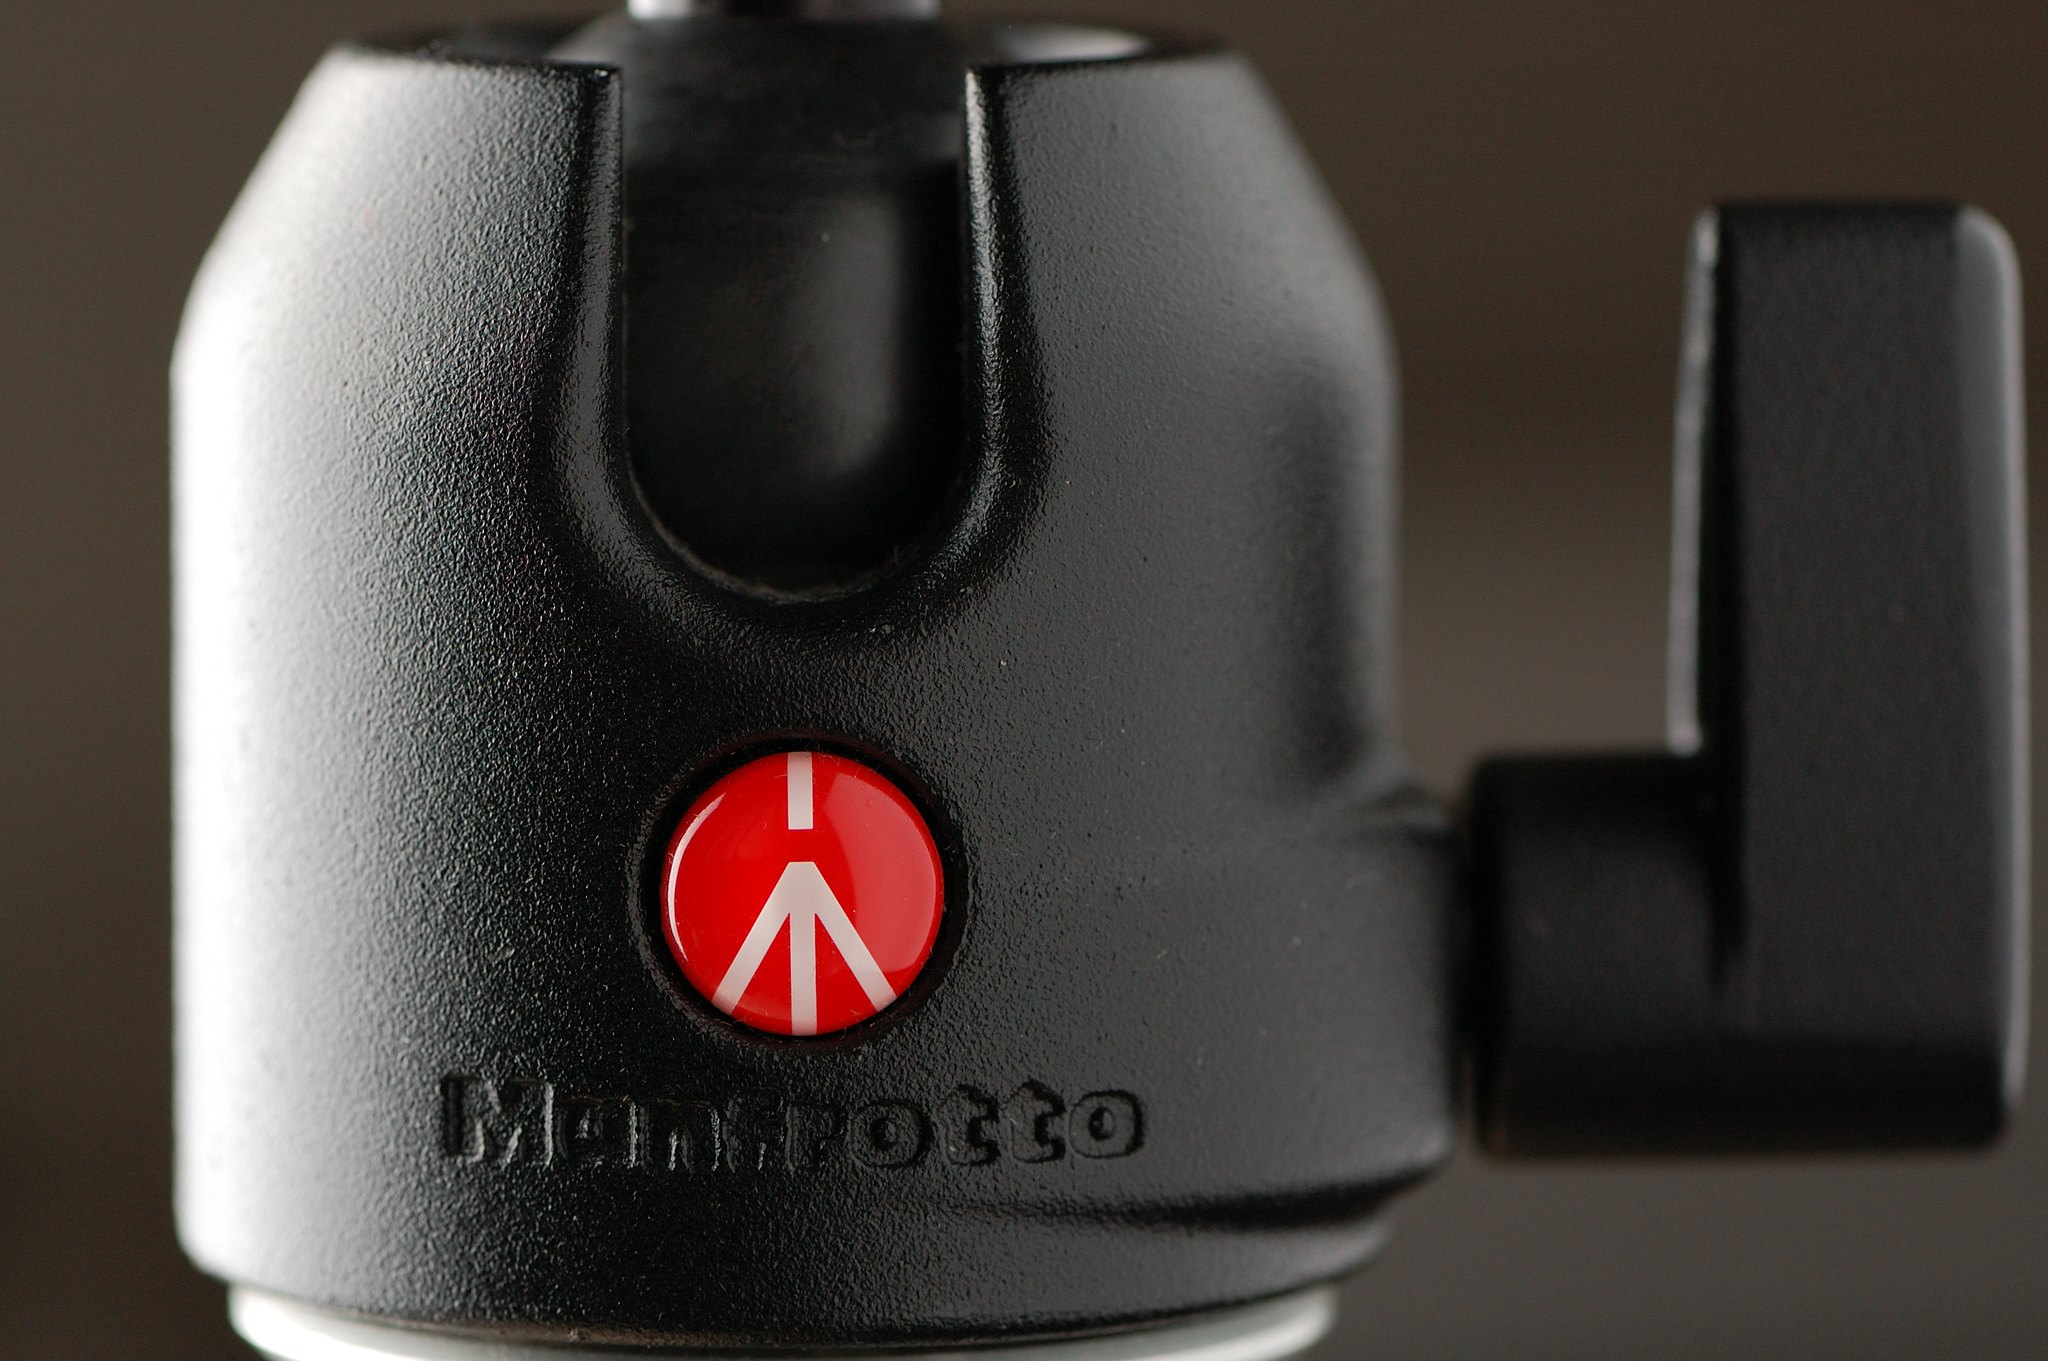 |
The images above have the softbox on camera left whilst on camera right is a white card used for bounce fill: the object has essentially 2 different types of light on it.
Notice the highlight on camera right - it is noticeably softer/more diffuse/less contrasty which is due to the second level of diffusion from the bounce card. The white card has taken the softbox light (reasonably large apparent size) and diffused it again - this accounts for the soft shadow transition/less contrast and the hallmark of a diffused light source. The camera left side which is illuminated only by the softbox has more contrast even though it's coming from the diffused softbox light.
When using one single light source for lighting products, it is necessary to use fill/secondary light source since we tend to be lighting from behind. The addition of a second similar light and modifier, the object would have the same quality of light. For our example (softbox + bounce fill) there are 2 types of light illuminating the object which gives it a non-uniform and somewhat less appealing overall feel.
Double Diffusion
To provide a more uniform quality of light we need to use similar lights. Fine but for this, let's keep this simple with one light and a bounce card. So, in addressing the uniformity of the light we can affect the softbox light - we're left with having to make the light more diffuse.So let's back up a second and discuss double diffusion - this is usually a technique that takes an already diffuse/large light source (remember that large apparent size gives us soft, diffused light) and we diffuse it again. Doing so we are making a larger and thus softer light source.
The original light source can be actual multiple diffused lights from umbrella'd light, softbox'd light etc and the second diffusion layer can be a scrim or any other diffusion material.
The net result, as with all diffused light, is that the double diffusion takes the already diffused and large(ish) light source and makes it bigger and in doing so takes the intensity per square inch and spreads that intensity over a larger area. This affects that transition zones making them smoother.
In shiny/reflective objects the double diffusion would soften/diffuse any distinct edge from the original light source. Consider the specular highlight on a shiny object- a specular highlight is nothing more than a reflection of the light. A square softbox etc would show up in the shiny object as a square specular with the edge of the light clearly defined. Pushing the softbox light through another diffusion layer (double diffusing it) spreads the intensity of the light and thus making the edges of the softbox light less apparent.
Double Diffusion vs Close Up
Double diffusing makes the light bigger still. But bringing in the original light source closer would also make it bigger. So what's the difference between the two? Below, the images show the double diffusion material and the original light source at the same distance (just out of frame, camera left).Apollo
Double diffusion | Close |
Ezybox
Double diffusion | Close |
Compare the double diffused light with the closer-in light. Whilst both lights are providing very diffused light, note the specular highlight transition - we can still make out very clearly the specular from the softbox diffusion panel.
Further note that the position of the double diffusion layer is important:
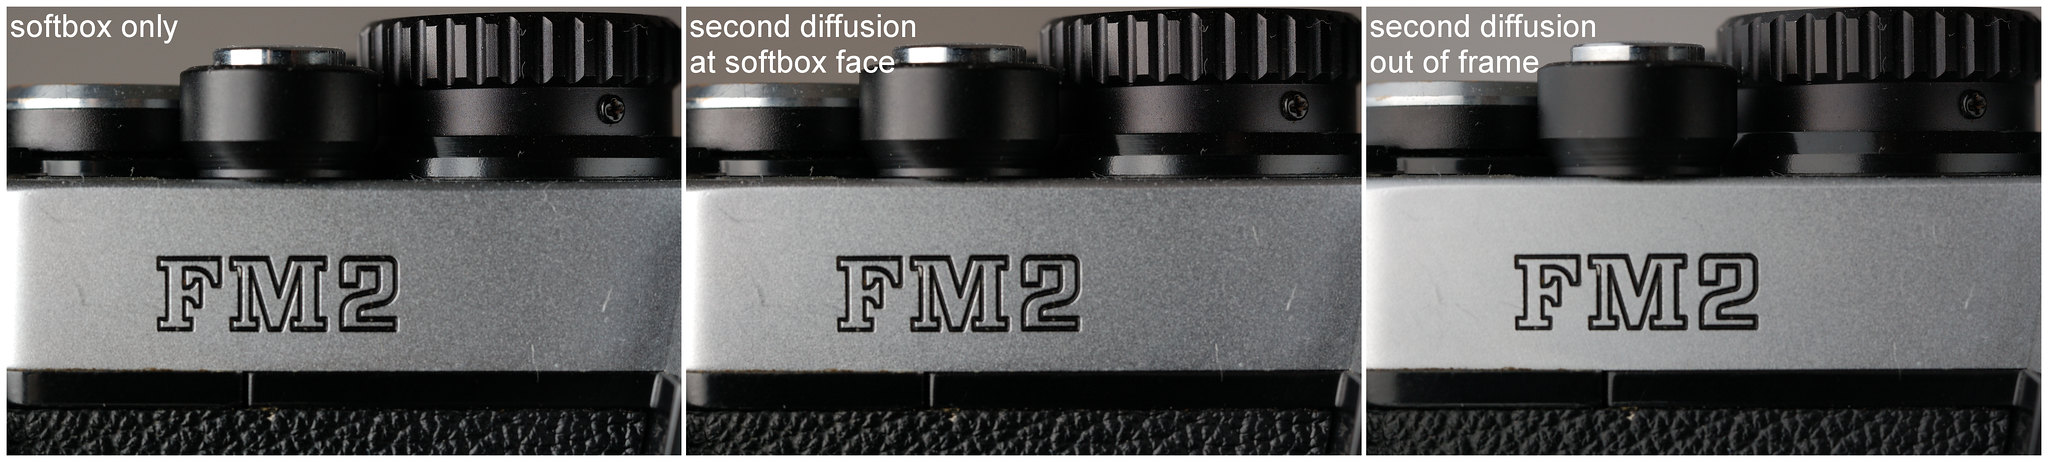
only change is the addition of the second diffusion layer
Notice that when the second diffusion layer is close to the softbox face there is only minimal change to the transition zones and the overal light intensity.
One additional thing to remember when bringing the light in close is that whilst it makes the light apparently bigger, it also increases the rate of falloff which may be another issue to address, even for small objects.
The double diffused light gives a very uniform look to the highlights although it removes a lot of the detail in this particular object whilst the softbox very close provides a good balance. More importantly, we can see the results and different quality of light between the different iterations available here and can apply as appropriate.
No comments:
Post a Comment