
fill only | key only | key and fill
Maths seems to rule the world and normally in a complex way. These are notes to allow us to approximate the final exposure based on an overlapping key and fill light.
However, before we jump into the random maths there is the question regarding key and fill. I'm primarily concerned about overlapping exposure from they key and an on-axis fill (although any fill that overlaps will obey the same principles).
So, why would you have an on-axis fill when a fill/bounce card will do? This is reasonable method for fill for tight single/couples. However if you have a large group or lose composition, then placing fill/bounce cards are not so appropriate - in this instance, an on-axis fill provides this solution.
The Maths
The Basics
Before we can calculate our final overlapping/additive/cumulative exposure we have to understand some basics.We are familiar with aperture numbers f/1.4, f/2.0 .. etc. but less are familiar with how these numbers are derived.
f(no) = 2 n / 2where n=0,1,2,3..
To obtain other fractions of f/stops, n should be expressed as such: n=4/3 in the above represents f/1.4 +1/3 (i.e. f/1.6) = 1.587.
n f stop 0 f/1.0 1 f/1.4 2 f/2.0 3 f/2.8 4 f/4.0 5 f/5.6 6 f/8 ... ...
Further to the above equation, we remember from school that if x = 2 y then y = log 2(x) or in calculator friendly form y = ln(x)/ln(2)
Calculating Cumulative Exposure Increase
To calculate the cumulative exposure increase given two known subject exposures (metered towards camera) Ekey and Efill (where Efill < Ekey) we use log2(A + B) where A (representing the key) and B (representing the fill) are represented as fractions of the key exposureEcumulative increase = log 2 ( 1 + 1/n )An example, if the fill is 2 stops down from key then we know fill = 1/4 key so n would be 4.
The above equation will give us the approximation for the cumulative/overlapping exposure in terms of 1/10 of a stop.
Calculating Cumulative Aperture
To determine the actual aperture for any key and fill combination, the following can be used:Ecumulative exposure = √(Ekey2 + Efill2)Ekey and Efill values are expressed in f/stops, i.e. 2.8 or 4 etc.
The above will give us the cumulative/overlapping exposure in terms of f/stops. An example, key is f/4 and fill is f/2.8 would give us 1/3 increase (see below) with final shooting aperture of f/4.5. The equation gives √(4^2 + 2^2) = 4.47
Typical Fill Examples
key -2 fill
For a cumulative exposure with fill 2 stops below key, we calculate the increase:log2(1 + 1/4) = 0.32This is a 3/10 of a stop increase on the key.
Indeed, when we metered this situation, our final exposure matches. Consider Ekey = f/4 and Efill = f/2:

Cumulative exposure based on the calculated increase and from the given exposure values:
f/4 + 1/3 = f/4.5
√(42 + 22) = f/4.47
key -1 fill
Similarly, for a cumulative exposure with fill 1 stop below key, we calculate the increase:log2(1 + 1/2) = 0.58This is a 6/10 of a stop increase on the key.
Again, when we metered this situation, our final exposure matches. Consider Ekey = f/4 and Efill = f/2.8:

Cumulative exposure based on the calculated increase and from the given exposure values:
f/4 + 2/3 = f/5
√(42 + 2.82) = f/4.88
It is important to note that these formula are independent of actual key and fill values.
The above also relates to both flash/flash and also ambient/flash cumulative exposures.
With the above, we are able if we desire to calculate the cumulative exposure for any arbitrary fill/key combination - obviously, using the meter will be significantly quicker but it's always interesting to know how it all fits together.

all shot f/4.0 - Left: key + -2fill | Center: key + -1fill | Right: key + bounce card
Why does this matter
As noted above, on axis fill is useful. But how does it affect the shadow areas? The following images have been adjusted in post from their RAW files to give equivalent exposures. Note the shadow transitions and depth, particularly on the camera right side of the dome diffuser. | 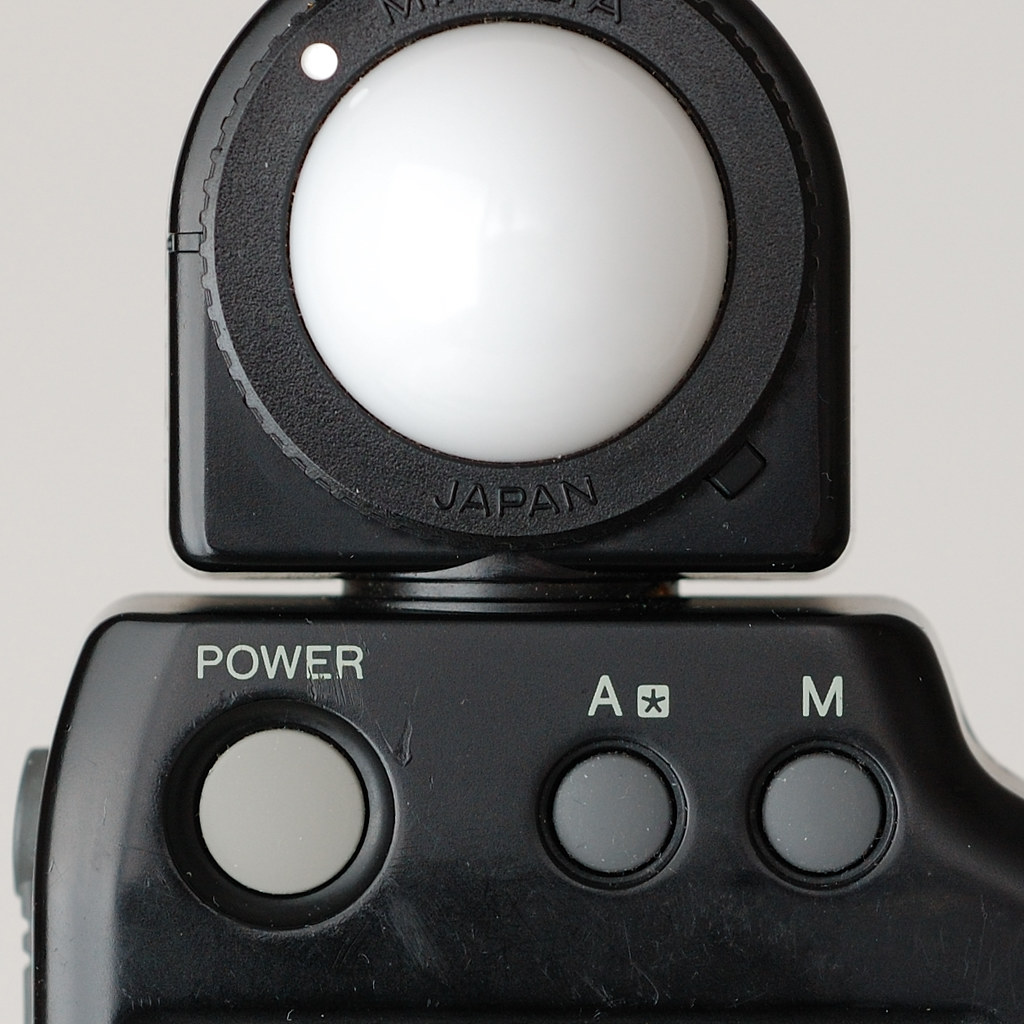 | 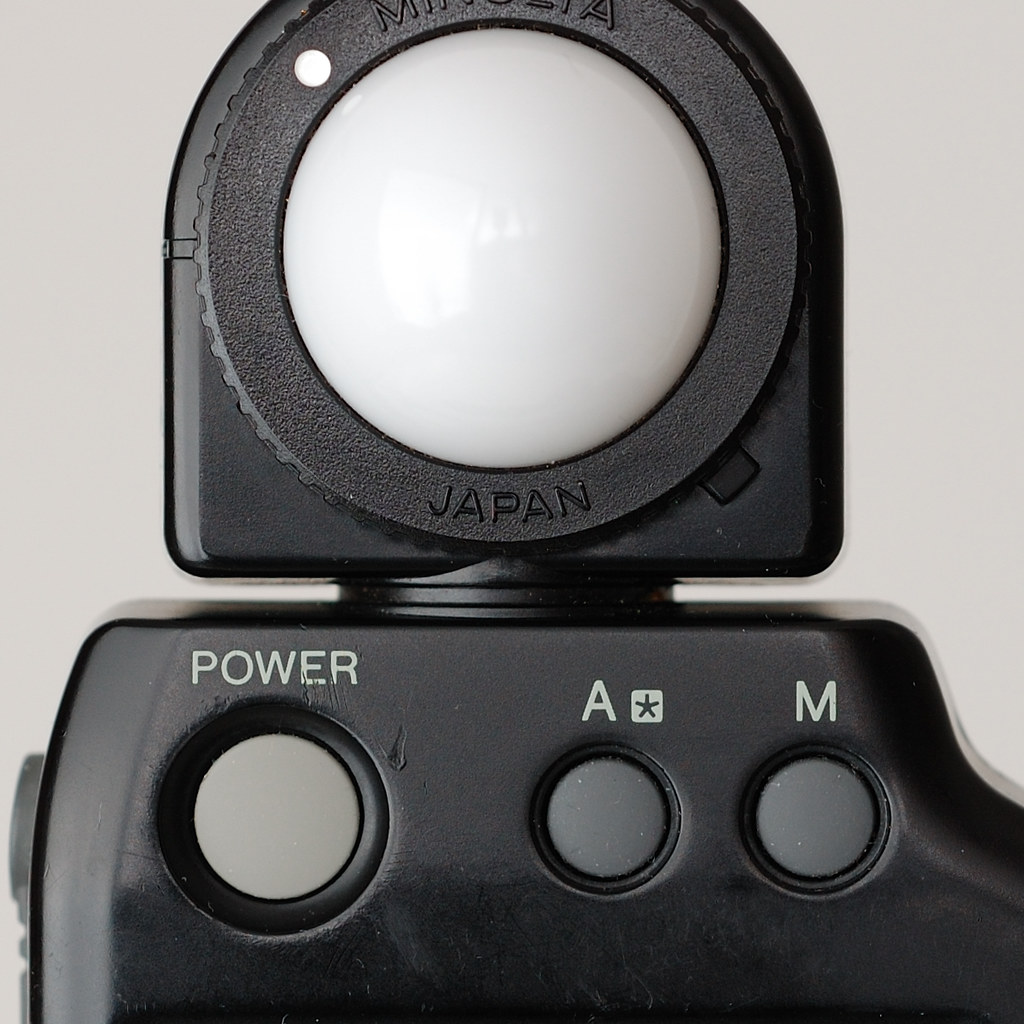 |
We can clearly see that the on-axis fill lifts the shadows and allows for definition.
No comments:
Post a Comment